Happy Halloween Design: A Designer’s Hands-On Review
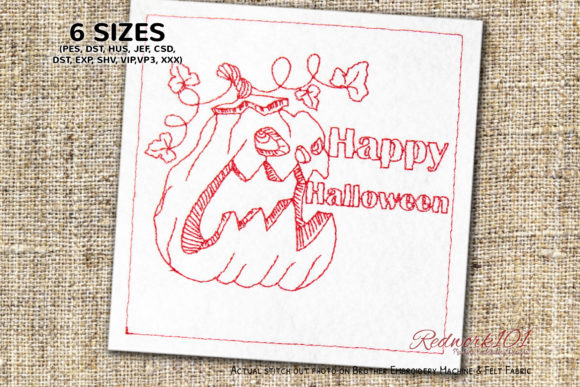
When I first opened the Happy Halloween Design file, I wasn’t expecting to be taken aback. I’ve stitched enough holiday-themed embroidery to know that Halloween designs tend to fall into one of two camps: either they lean so hard into cutesy that they lose any sense of mood, or they go full horror in a way that alienates half your customer base. This design sits somewhere smarter. It has a personality that feels both polished and playful, and after running it through several test stitches and real product applications, I can say it earns a serious look from anyone who sells handmade goods or runs a small embroidery business.
The visual mood is immediate. The silhouette is clean, with enough weight to read well from a few feet away, but the details inside the shape keep it from feeling flat. There is a sense of depth built into the layout without relying on heavy stitch density. That balance is harder to pull off than most non-embroiderers realize. Too many details packed into a small area and you get thread distortion, fabric puckering, or a design that looks muddy once it’s on a sweatshirt. Happy Halloween Design avoids that trap. It breathes.
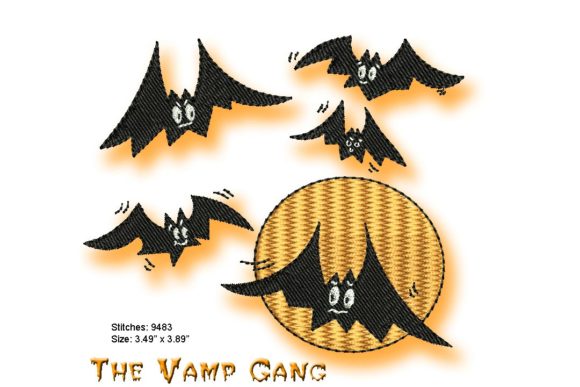
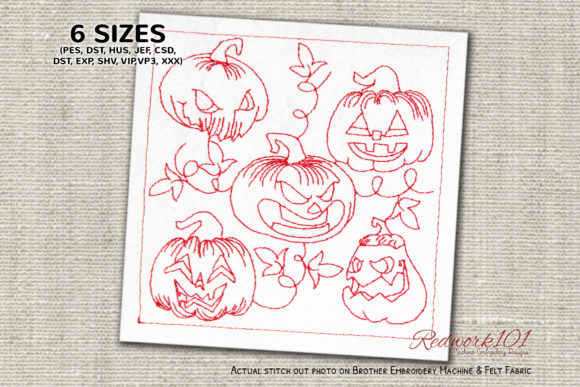
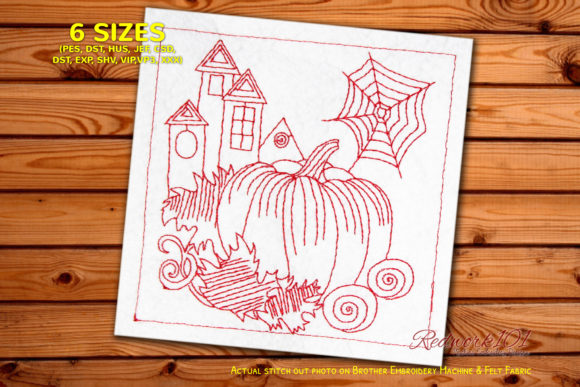
That said, the product description mentions that the Box Stitch shown in the picture is optional and that the color of the outer box may differ from what you see in the preview. This is worth noting because that outer box can change the entire framing of the design. I tested it with the box stitch on a cream-colored tote bag and without it on a black fleece pullover. With the box, the design feels more like a standalone graphic patch—structured, intentional, ready to be centered on a product. Without it, the motif floats more freely and works better on smaller items like caps or baby onesies where a boxed frame would crowd the space. The choice genuinely depends on your product, and I appreciate that the design gives you that flexibility rather than locking you into one presentation.
First Stitch Impressions and Real Fabric Behavior
I loaded the Happy Halloween Design onto my multi-needle machine using a medium-weight cutaway stabilizer and tested it on three different fabric types: a standard cotton twill tote bag, a 50/50 polyester-cotton sweatshirt, and a linen-blend kitchen towel. The design stitched out cleanly on all three, though I noticed slight differences in how the fill stitches settled. On the sweatshirt, the stitches nested nicely into the fleece without sinking too deep. On the linen towel, I needed to reduce the tension slightly because the fabric had less give, but once adjusted, the design held its shape well.
The thread color separation is logical and easy to follow. There are no unnecessary color stops that force you to change thread for tiny accent details that barely show. Every color change serves a purpose, which is something I always check when reviewing a machine embroidery design for commercial use. If you are running a small shop and stitching multiple units, unnecessary color changes kill your time and your profit margin. Happy Halloween Design respects that reality.
I also ran it through a black-and-white mockup test to see how it reads without color cues. This is a habit I picked up years ago when I started selling on Etsy. If a design still looks clear and recognizable in grayscale, it will likely read well on dark fabric or when a customer chooses unexpected thread colors. This design passed that test. The silhouette is strong enough that even without Halloween-specific colors, the shape itself communicates the theme.
Where This Design Performs Best on Real Products
After testing, I have a clear picture of where Happy Halloween Design will earn its keep in a product lineup. It excels on:
- Custom apparel – Sweatshirts, long-sleeve tees, and hoodies. The design sits well on the chest or upper back and doesn’t fight with seams or necklines.
- Tote bags – Both cotton and canvas. The optional box stitch gives you the choice of a framed look or a floating motif, which matters when you’re designing for different bag sizes.
- Embroidered patches – The design has enough internal structure that it stitches into a dense, durable patch without gaps or puckering along the edges.
- Baby and kids apparel – Scaled down, it works nicely on onesies and toddler tees. The details are not so tiny that they get lost on small garments.
- Pillow covers and home decor – A set of Halloween pillow covers with this design would sell well at fall craft fairs. The stitch quality holds up to repeated use and gentle washing.
- Kitchen towels and aprons – For functional home items, the design adds a festive touch without overwhelming the product’s everyday use.
If you are an Etsy seller or craft business owner thinking about your Halloween lineup, this design gives you range. It works as a standalone product feature or as part of a themed collection. I could easily see it used on a trick-or-treat tote, a barista apron, or even a cap if you keep the box stitch off and reduce the scale slightly.
Where to Use Caution Before Stitching
No design is perfect for every surface, and Happy Halloween Design has a few limitations worth noting. The first is small hoop sizes. If you are working with a 4x4 hoop, the design will fit, but you will need to be careful about the detail areas. I recommend testing on scrap fabric first to confirm that the smaller stitch zones do not overlap or create excessive density. On a mini hoop, the design still looks good, but the stitch count per square inch increases, which can cause fabric distortion on lightweight materials.
Second, textured fabrics like thick sweaters or high-pile fleece can soften the edges of the design. This is not a dealbreaker, but if you are stitching on something like a chunky knit cardigan, you may want to use a heavier stabilizer and slow down your machine speed. The design relies on clean outlines to keep its visual impact, and too much fabric texture can blur those lines.
Third, stretchy fabrics such as lightweight jersey or ribbed knits require careful hooping. The design does have some fill areas that can pull if the fabric is not stabilized properly. I always tell my students and clients: if you are stitching on a stretchy tee, use a cutaway stabilizer and consider a temporary spray adhesive to keep everything flat. Skipping that step here will result in registration shifts that ruin the finished product.
Dark fabric is another consideration. The design uses color breaks that assume a certain contrast level. If you stitch it on black or very dark navy, some of the finer internal details may not pop the way they do on lighter backgrounds. I tested this on a deep charcoal sweatshirt and had to swap one thread color for a brighter shade to restore the contrast. The design itself handled the change fine, but it is worth noting if you plan to offer the same design on multiple fabric colors in your shop.
Finally, curved surfaces like caps and beanies require a size reduction and careful placement. The design is not inherently curved, so if you place it too far forward on a cap, it can look distorted. I would keep it centered on the front panel and avoid stretching the fabric when hooping.
Visual Appeal, Customer Trust, and Brand Consistency
From a buyer’s perspective, the finished product needs to look like it was always meant to be on that item. Happy Halloween Design delivers that feeling. When I stitched it onto a tote bag and showed it to a few friends who run small retail booths, they all commented that it looked “store quality.” That kind of reaction matters because it directly affects whether a customer trusts your brand enough to purchase. If your embroidered products look homemade in a sloppy way, you lose repeat buyers. If they look clean and intentional, you build credibility.
The design also works well as a gift item. I made a test batch of personalized Halloween towels for a friend’s holiday gathering, and the reaction was overwhelmingly positive. The design did not dominate the towel; it complemented the fabric and the occasion. That is the hallmark of a versatile embroidery file. It adds value to the product without screaming for attention.
For shop owners who sell design assets or printable mockups, this file photographs well. The stitch lines are distinct enough to show up clearly in product photos, which means your mockups will look professional even before you add filters or lighting adjustments. That alone is worth considering if you create digital products for other embroiderers.
Practical Designer Notes Before You Commit
Before you stitch Happy Halloween Design on a client order or add it to your production queue, run through this checklist:
- Test on scrap fabric first – Especially if you plan to use the optional box stitch. Confirm that the outer box color matches your intended thread palette, and if it does not, decide whether you want to skip it or recolor it.
- Check your hoop size – The design fits standard hoops, but verify the exact dimensions in your embroidery software before you hoop expensive fabric.
- Review stitch density – If you are stitching on lightweight or delicate fabrics, check whether the density is appropriate. Dense designs on thin fabric can cause show-through on the back or even fabric damage during repeated washing.
- Test light and dark backgrounds – Run a stitchout on both a light and a dark fabric to see how the color separation holds up. Adjust thread colors if needed.
- Use proper stabilizer – Cutaway for stretchy or knit fabrics, tearaway for stable wovens. Do not skip this step just because the design looks simple.
- Check licensing for commercial use – If you plan to sell finished products or the digital file itself, confirm the license terms. Most embroidery designers are clear about this, but it is your responsibility to verify before you list items in your shop.
I also recommend running a black-and-white printout of the design at actual stitch size and placing it on the product where you intend to stitch. This helps you visualize placement without wasting stabilizer or fabric. It is a small step that saves a lot of frustration later.
Final Thoughts on Happy Halloween Design for Real Projects
Happy Halloween Design is not the loudest Halloween embroidery file I have ever used, and that is exactly why I like it. It has restraint. It understands that a design does not need to shout to be effective. Whether you are stitching a single personalized gift for a friend or producing a run of custom apparel for a holiday pop-up shop, this design holds up under real working conditions. It is flexible enough to adapt to different products and professional enough to raise the perceived value of whatever you put it on.
If the optional box stitch fits your product vision, use it. If not, trust the standalone motif. Both options produce a clean finished product that customers will actually want to wear, carry, or display. That is the bottom line for any embroidery project. Happy Halloween Design earns a place in my seasonal rotation, and I suspect it will earn one in yours as well.